
I am going to start a series of posts demonstrating the creation of dynamic blocks in AutoCAD. If you haven’t worked with dynamic blocks yet, hopefully this series will give you the confidence to jump in and create your own. If you are already creating dynamic blocks, hopefully you will learn something new that you can apply to your work. These posts are based upon a top rated class of mine that I have presented multiple times at Autodesk University.
Today we are going to look at the ability to create a block with multiple insertion points. We have all had the situation where we insert a block, but the insertion point is not quite where we would like it. So what do we do? We usually place it somewhere in space, then move it into place using the object snap of choice. Let’s look at how we can improve this workflow with multiple insertion points!
If you would like to try the same exercise that I use in the demonstration, you can download the exercise drawing file here: Insertion_Points.dwg
This lesson is presented in the following video. Step-by-step instructions are also included below.
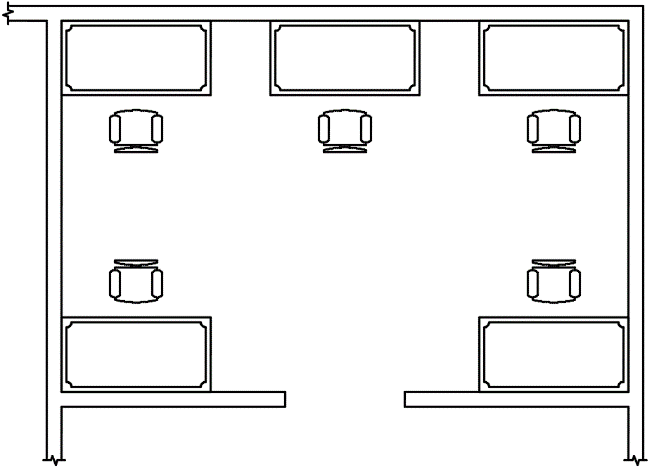
The drawing file contains a block of a desk.
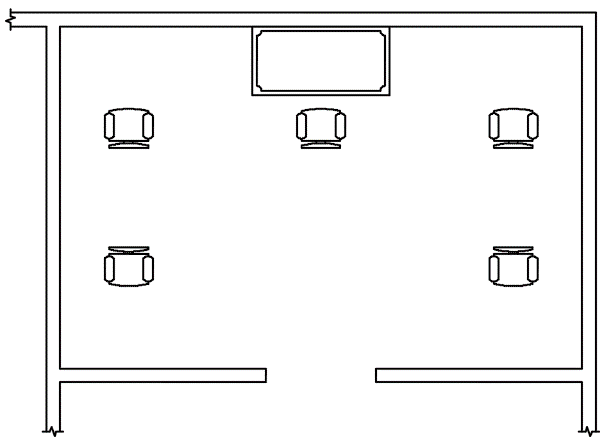
The desk needs to be inserted into the four corners of the room. To make the process more efficient, I am going to add insertion points to each corner of the desk.
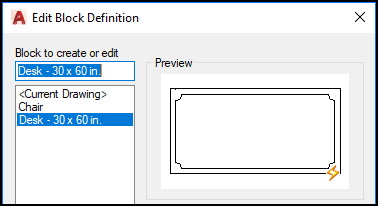
Double-click on the desk to open the Block Editor.
Confirm that the correct block is selected, then click <<OK>>.
The desk is now open in the Block Editor environment. The Block Authoring Palettes should appear. If they do not, select Ribbon: Block Editor > Manage >Authoring Palettes.
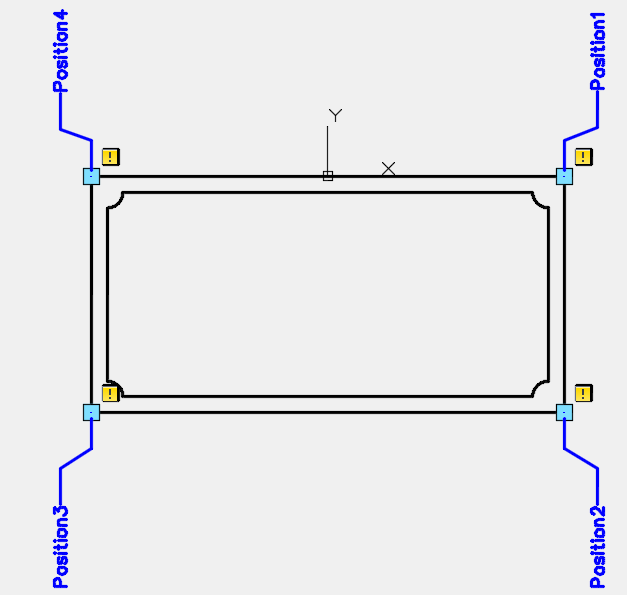
Select the point parameter, located at Palette: Block Authoring > Parameters > Point.

Using the Endpoint Object Snap, select the upper-right corner of the desk.

Click above the selected point to place the Position 1 label.

Repeat the process to add point parameters to the other three corners. For best results continue clockwise from the first point. This will provide a smoother transition between insertion points later when the block is being inserted.
Save the block by selecting Ribbon: Block Editor > Open/Save > Save Block.

Close the block editor by selecting Ribbon: Block Editor > Close > Close Block Editor.

Now let’s insert another copy of the Desk block into the drawing. Select Ribbon: Home > Block > Insert. Select the Desk – 30 x 60 in. block.
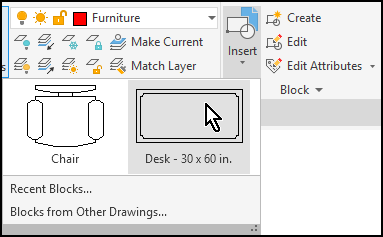
Press the [Ctrl] key at the keyboard to cycle through the insertion points. The insertion point starts at the original location on the top midpoint, and then moves clockwise around the desk. The desk can now be placed quickly at each corner of the room.
I hope that you have found this helpful. Feel free to leave a comment below if you have any questions. Stay tuned for the next post, where we will look at adding the Alignment grip to a dynamic block.
